


Featured Publications
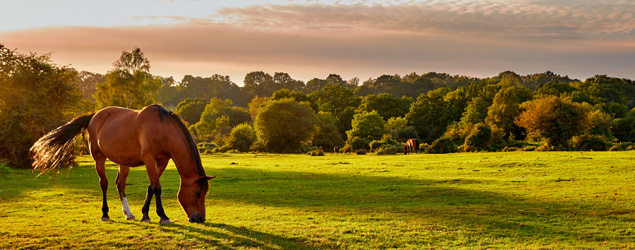
Toxic Weeds and Trees in Horse Pastures
(B 1571)
A handy reference for horse owners and land managers to help identify weeds that are toxic to horses, with pictures to aid identification, a brief description of the plants, and the specific toxicity symptoms associated with common weeds and trees that are poisonous to horses. It also gives tips on how to better manage pastures to prevent pasture-related plant toxicities. This publication is suitable for a general audience concerned with equine health and pasture safety.
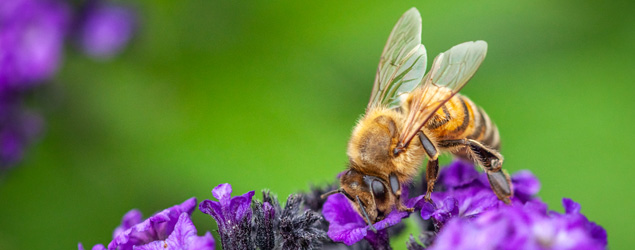
The Intersection of Mosquito Management and Pollinator Protection
(C 1188)
Mosquitoes can transmit a wide variety of pathogens and significantly reduce our quality of life with their aggressive biting behavior. On the other end of the spectrum, pollinators are a critical part of our natural environment, contributing significantly to food production and ecological diversity. Honey bees, along with other pollinators, are susceptible to pesticides, and significant bee kills have occurred because of mistimed or misguided pesticide applications. When conducted properly, an integrated pest management approach does not pose a significant risk to honey bee colonies.

Turfgrass Diseases: Quick Reference Guide
(C 891)
A handy reference for the causal agents, susceptible turfgrasses, conditions promoting disease, symptoms, and control of: brown patch, dollar spot, Pythium, Helminthosporium leaf spot, fading out, gray leaf spot, fairy ring, take-all root rot, rust, slime mold, and nematodes.

Spanish Series: Enfermedades de Céspedes: Guia de Referencia Rapida
(C 891-SP)
Agente causal, céspedes susceptibles,condiciones que promueven la enfermedad, síntomas y control de mancha parda, mancha dólar, quemazón por Pythium, mancha foliar por Helminthosporium, marchitamiento por Curvularia, mancha foliar gris, anillo de hada, enfermedad toma-todo o pudrición radicular por Gaeumannomyces, roya, hongos gelatinosos y nematodos.

Cleaning Healthy, Cleaning Green
(C 1114)
People spend an average of 90 percent of their time indoors. Studies conducted by the Environmental Protection Agency (EPA) show levels of several common organic pollutants to be two to five times higher inside homes than outside. Many of these pollutants come from the volatile organic compounds (VOCs) released from household cleaning products. Indoor pollutants can be reduced by limiting the number of chemicals used indoors. By following three basic guidelines you can improve your indoor environment, save money, and help conserve natural resources.

Ornamental Plantings on Septic Drainfields
(C 1030)
Ornamental plantings can be attractive and beneficial options for the expanse of open ground designated for a septic drainfield. Properly chosen plants help manage moisture and nutrient levels in the soils around the drainfield, and can discourage activities that may cause site compaction and reduce the effectiveness of the system. The drawback is that poor plant choices can create costly maintenance issues, and any septic drainfield repair work could disturb planting areas that you value. By following a few simple guidelines, planting in these areas can be both pretty and practical.
High-Quality Print Publications
In addition to more than 1000 publications that can be viewed and downloaded for free, UGA Extension offers several high-quality publications for purchase.
Spanish-Language Resources
Dozens of UGA Extension publications have been translated into Spanish. View these publications by category on our Publicaciones en Español page.
Recently Published
-
Hurricane Helene Impact Report (AP 133-1)
Recently Updated
-
Canola Production in Georgia (B 1331)
-
Mite Management in Turfgrass (C 1178)
Publicaciones Recientes en Español
What are UGA Extension Publications?
A numbered UGA Extension publication has been peer reviewed, has enough substance to stand on its own, and is written to be used and understood by the public. All numbered publications have been written by university faculty to provide information on topics including the environment, agriculture, health, families and the home landscape.